

Agent tasks
Schedule CloudX Agent to run recurring checks, review results, and notify your workspace when something needs attention.
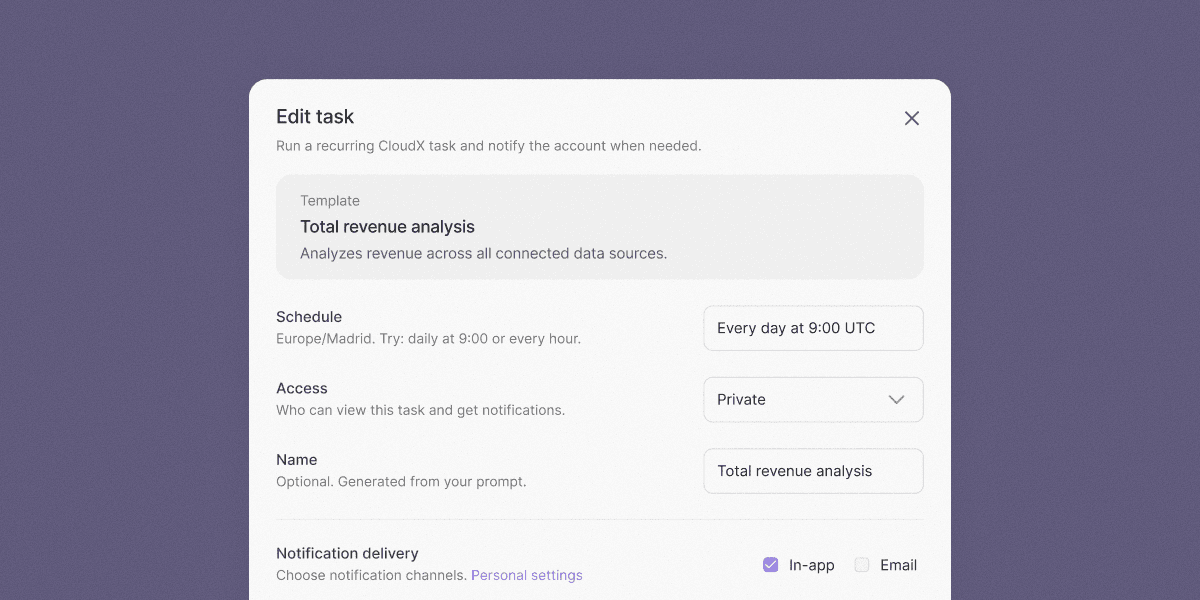
Overview
Agent tasks run a CloudX Agent prompt on a recurring schedule. Use them for routine analysis such as revenue reviews, health checks, anomaly detection, and experiment monitoring.
Each run reads the current data in your workspace. It records the result in the task’s run history. When the result needs attention, CloudX notifies the people who have access to the task. The task controls the notification methods. Each recipient controls their own email delivery schedule.
Create a task from a template
Templates provide a ready-made prompt and schedule for common checks. They include daily health checks, weekly performance reviews, revenue anomaly alerts, and A/B test reviews.
Open Agents
In the CloudX Dashboard, select Agents in the main navigation.
Start creating an agent
Select Create agent. If this is the first task in your workspace, select one of the displayed templates or select Show more.
Choose a template
Review its purpose and default schedule. Select the template that matches the check you want to run.
Choose access
Under Access, select Private (just me) or Workspace. Private tasks are visible only to you. Workspace tasks are visible to everyone in the workspace.
Choose notification methods
Under Notifications, select In-app, Email, or both. At least one method must remain enabled.
Create the agent
Select Create agent. The task starts enabled and shows its next scheduled run on the Agents page.
Templates keep their managed prompt. You can edit the schedule, access, notification methods, and enabled state after creation.
Create a custom task
Select Create agent, then select Custom to define your own check.
Enter these settings:
- Name identifies the task. CloudX generates a short name from the prompt if you leave it empty.
- Run schedule accepts plain language, such as
every day at 9:00,every hour, orweekdays at 8:30. - Access controls who can see the task, open its run history, and receive notifications. Select Private (just me) or Workspace.
- Notifications selects In-app, Email, or both.
- Prompt tells the agent what to inspect and when a result requires attention.
The schedule uses your current time zone unless you name another time zone. CloudX shows the time zone with the saved schedule and uses it across daylight-saving changes.
Write a prompt with a specific scope and notification condition. For example:
Compare yesterday's revenue with the previous seven-day average.
Notify me if revenue decreased by more than 20%.
Name the apps and countries that explain most of the change.Notifications and email delivery
Every run appears in run history. A run sends a notification only when the agent determines that its result meets the prompt’s notification condition or otherwise needs attention.
The task’s Access setting controls who receives these updates:
- Private (just me) gives access to the task creator only.
- Workspace gives access to everyone in the workspace.
The task’s Notifications setting controls whether CloudX sends updates in the app, by email, or both. Each recipient controls their own email delivery schedule:
- Open your profile menu and select Settings.
- Select Notifications.
- Enable Email notifications.
- Choose As soon as possible, Daily, or Weekly.
- Set the delivery time, then select Save changes.
Daily and weekly email times use the time zone shown on the Notifications page. Disabling email does not disable in-app notifications or the task itself.
Review runs and results
The Agents page shows each task’s creator and access level. Select a task to open its run history. The page shows the latest answer, run time, trigger, status, and notification state for each run.
The trigger is Scheduled for a normal scheduled run or Manual for a run started with Run now. A run can be queued, running, completed, or failed.
Select a completed run to open its full conversation in Ask CloudX. You can read the analysis, inspect supporting details, and continue the conversation with follow-up questions. Runs that are still processing cannot open until they finish.
Use search to find text from a result. Use Filter to narrow the history by trigger, status, or notification state.
To test a task before its next scheduled time, open it and select Run now. The task must be enabled, and only one run can be active at a time.
Manage a task
To change a task, select it and then select Edit. You can update its name, schedule, access, notification methods, and enabled state. Custom tasks also let you update the prompt.
Editing requires workspace edit permission and access to the task. Any editor can change a Workspace task. Only the creator can access a Private task. Only the creator can change a Workspace task to Private.
Turn off Enabled to pause future runs without deleting the task or its history. Turn it on again when you want the schedule to resume.
To delete a task, open the actions menu on the Agents page and select Delete agent. Confirm the deletion. This permanently removes the task and its run history. It also stops future runs.