> ## Documentation Index
> Fetch the complete documentation index at: https://docs.cloudx.io/llms.txt
> Use this file to discover all available pages before exploring further.
# Media.net (BETA)
> Use this guide to configure Media.net bidding in CloudX.
Media.net is currently beta in CloudX. If it is not visible in the `Bidders` section, contact your CloudX account manager for beta access.
Keep using the platform integration guides for CloudX SDK installation and ad loading:
* [Android integration guide](/en/android/integration)
* [iOS integration guide](/en/ios/integration)
Media.net is a server-side bidder: CloudX requests bids on the server and renders winning creatives with the CloudX SDK's built-in renderer. There is no Media.net SDK or adapter to add to your app.
## Overview
Use the following values:
* `Media.net Publisher ID` on the Media.net page under `Bidders`; this account-level value applies to all applications
* CloudX `app_key` and CloudX ad unit identifiers in app code
There are no Media.net app IDs or placement IDs to map in CloudX. After onboarding, enabling the bidder, entering the Publisher ID, and adding line items is the entire CloudX setup.
### Supported ad formats:
* Banner (320x50)
* MREC (300x250)
* Interstitial
* Rewarded
Native is not supported yet.
## Step 1. Complete Media.net onboarding and update app-ads.txt
Contact your Media.net account manager before enabling live traffic. If you do not have a Media.net contact, ask your CloudX account manager to coordinate the onboarding.
Media.net assigns one Publisher ID per publisher account. That same ID is reused across every app in the account.
Provide Media.net with the apps you plan to enable, then publish the matching app-ads.txt line for your Publisher ID:
```txt theme={null}
media.net, , DIRECT
```
Replace `` with the Publisher ID Media.net supplies for your account. Publish the line at `https://yourdomain.com/app-ads.txt`, where `yourdomain.com` is the developer website listed in the App Store or Google Play. Keep the existing entries for CloudX and other networks.
## Step 2. Enable Media.net in CloudX and add the Publisher ID
Go to `Bidders` in the dashboard navigation, select `Media.net` in the bidder list, and click `Enable`.
On the same `Media.net` page enter the `Media.net Publisher ID` supplied during onboarding. This value is required, applies to every app in the CloudX account. There is nothing to configure at the ad-unit level.
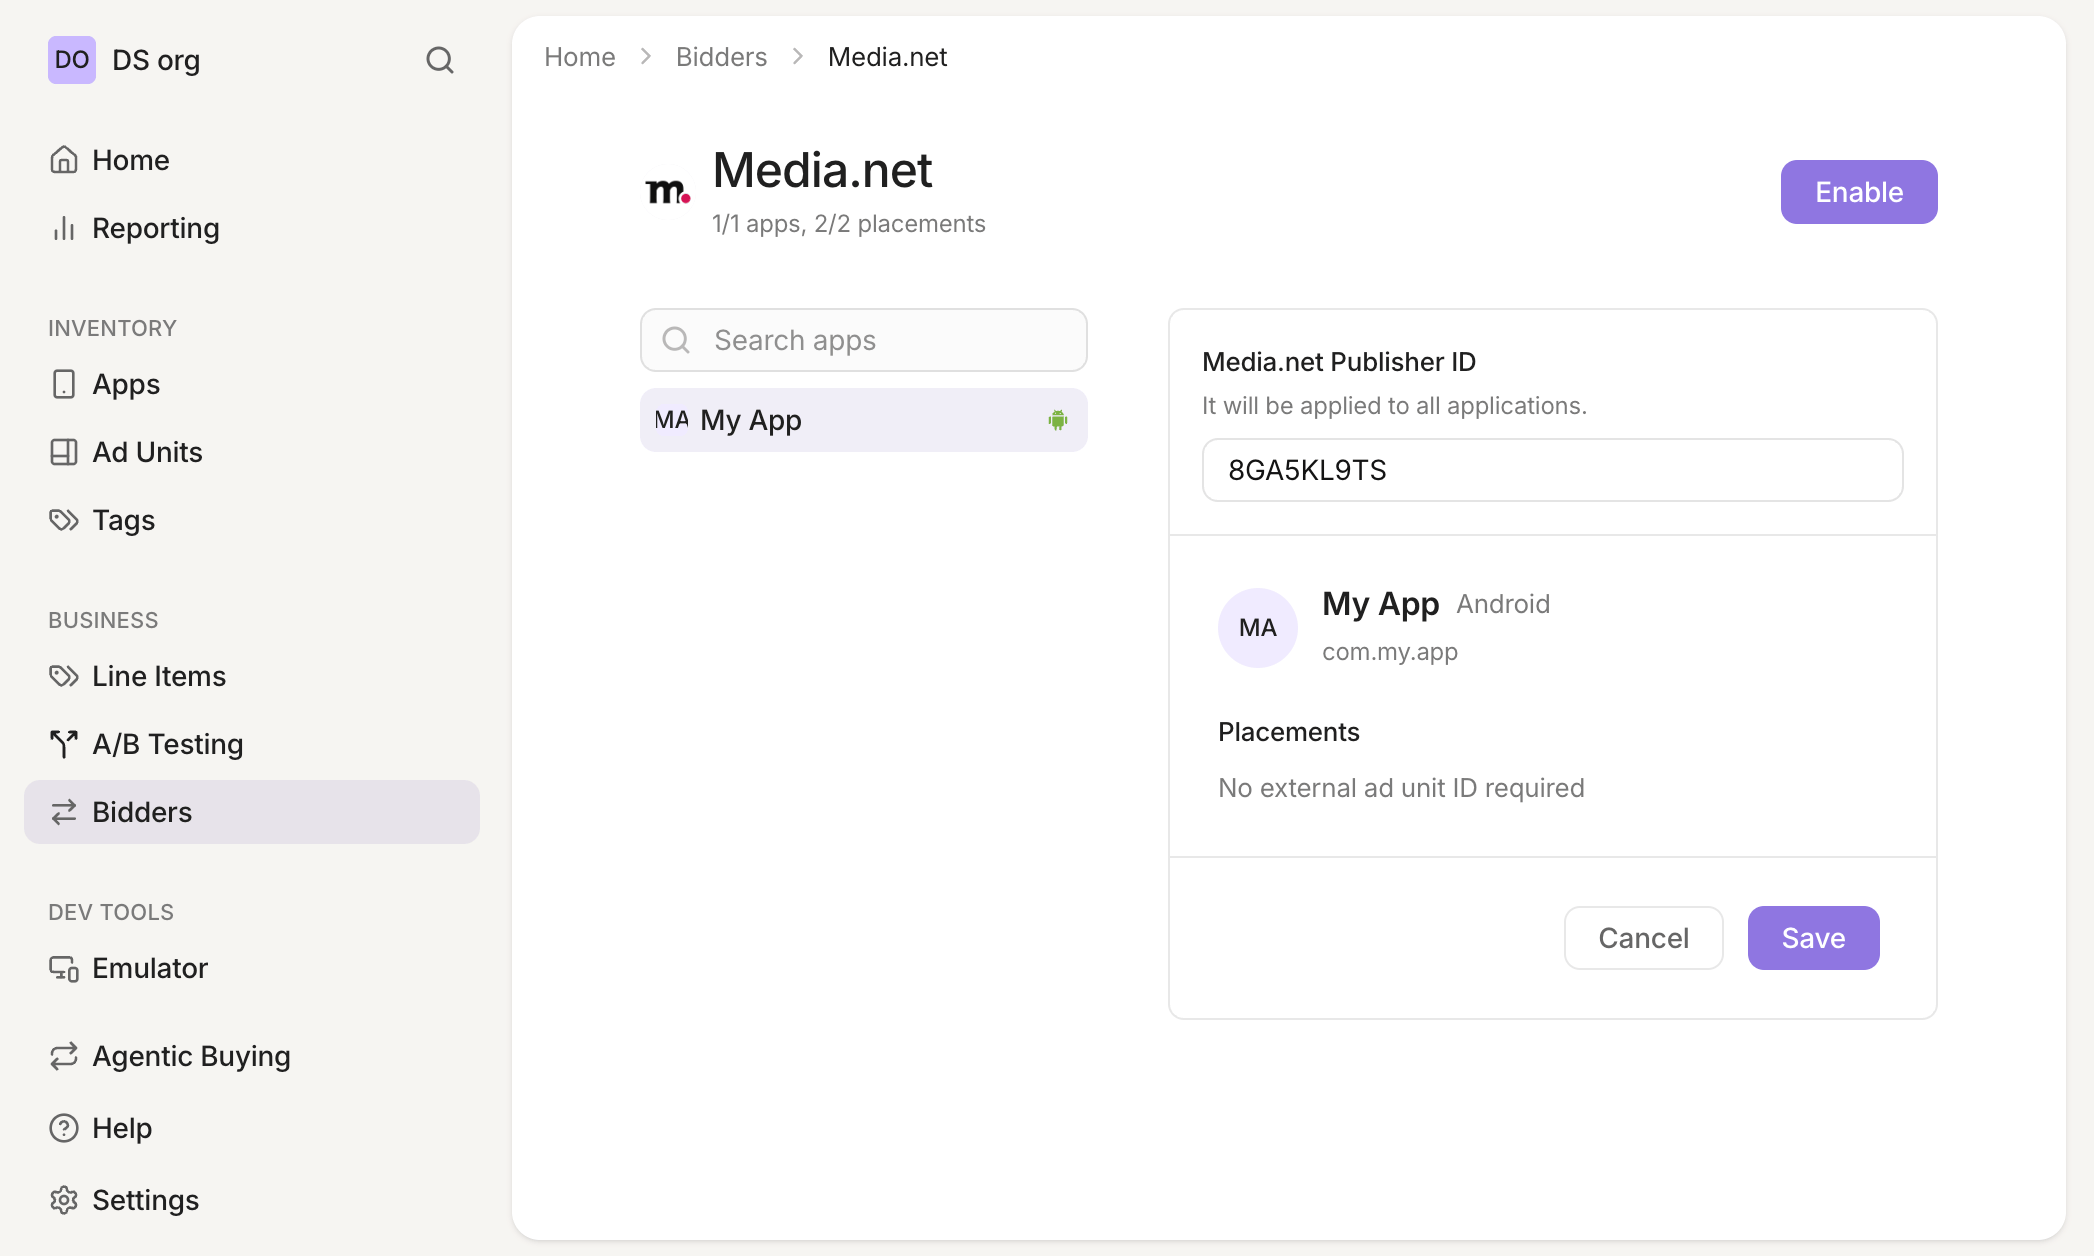 If `Media.net` is disabled, CloudX will not request Media.net bids for your inventory. If Media.net is not listed, request beta access from your CloudX account manager.
## Step 3. Add Media.net line items
Go to `Line Items` and create line items for bidder `Media.net` on each CloudX ad unit where Media.net should compete.
If `Media.net` is disabled, CloudX will not request Media.net bids for your inventory. If Media.net is not listed, request beta access from your CloudX account manager.
## Step 3. Add Media.net line items
Go to `Line Items` and create line items for bidder `Media.net` on each CloudX ad unit where Media.net should compete.
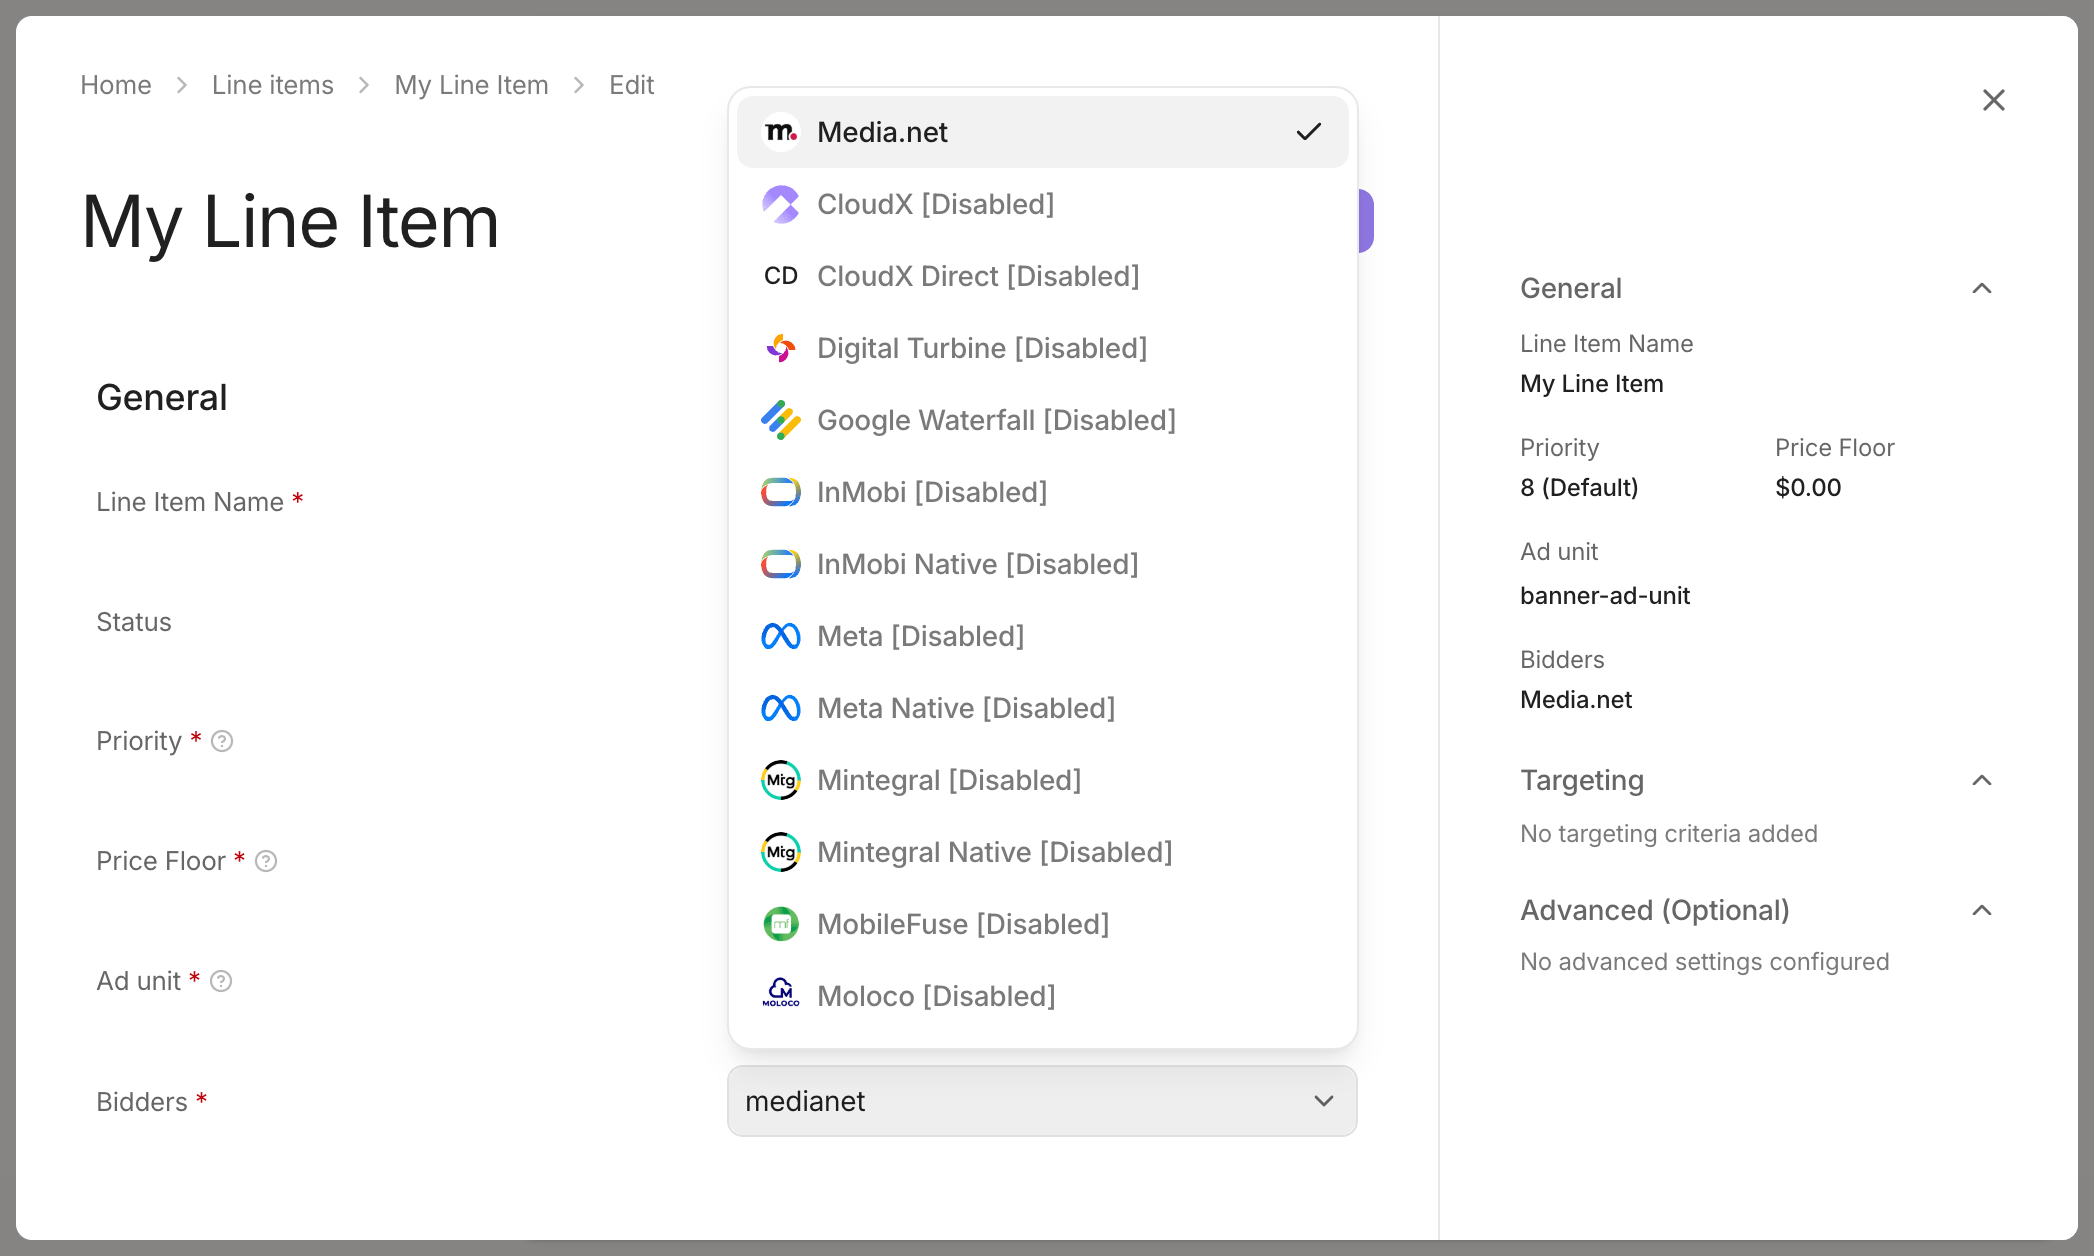 * Target Banner, MREC, Interstitial, or Rewarded ad units
* Repeat the setup for each ad unit where Media.net should bid
## Step 4. Test and validate
Media.net does not provide a formal RTB test mode. Use controlled live traffic after Media.net confirms your Publisher ID and app-ads.txt setup.
1. Add your device as a CloudX test device so you can inspect CloudX behavior during validation.
2. Build and run the app with the CloudX `app_key` and the correct CloudX ad unit identifiers.
3. Request ads from each Banner, MREC, Interstitial, and Rewarded ad unit where Media.net is enabled.
4. Confirm that Media.net participates or wins where expected and that returned ads render correctly.
5. Compare impressions and revenue with Media.net after traffic begins flowing.
CloudX test-device configuration helps you validate your integration, but it does not make Media.net return test ads. No fill during a small test can be normal and does not by itself indicate that the setup is broken.
## Troubleshooting
### Media.net is not listed
Media.net is currently beta in CloudX. Contact your CloudX account manager to request access if it is not visible in the `Bidders` section.
### Media.net is not bidding
Check the following first:
* `Media.net` is enabled in the `Bidders` section
* The required account-level `Media.net Publisher ID` is present
* A `Media.net` line item exists for the ad unit
* The ad unit is Banner, MREC, Interstitial, or Rewarded (Native is not supported)
* Your app-ads.txt file includes `media.net, , DIRECT` with the correct Publisher ID
* The app store listing points to the developer domain hosting the updated app-ads.txt file
### Media.net bids but the ad does not render
Check the following:
* Your app is using the CloudX `app_key` and loading the intended CloudX ad unit
* Your app is on a current CloudX SDK version
* The ad unit is configured as Banner, MREC, Interstitial, or Rewarded
Media.net creatives render through the CloudX SDK's built-in renderer. If a specific creative fails consistently, contact CloudX support with the app, ad unit, and approximate time of the failure.
### Demand is lower than expected
* Confirm with Media.net that your Publisher ID and app-ads.txt line are correct for your account.
* Allow time for Media.net and its buyers to re-crawl the updated app-ads.txt file.
* Validate with controlled live volume because Media.net does not provide RTB test demand.
* Target Banner, MREC, Interstitial, or Rewarded ad units
* Repeat the setup for each ad unit where Media.net should bid
## Step 4. Test and validate
Media.net does not provide a formal RTB test mode. Use controlled live traffic after Media.net confirms your Publisher ID and app-ads.txt setup.
1. Add your device as a CloudX test device so you can inspect CloudX behavior during validation.
2. Build and run the app with the CloudX `app_key` and the correct CloudX ad unit identifiers.
3. Request ads from each Banner, MREC, Interstitial, and Rewarded ad unit where Media.net is enabled.
4. Confirm that Media.net participates or wins where expected and that returned ads render correctly.
5. Compare impressions and revenue with Media.net after traffic begins flowing.
CloudX test-device configuration helps you validate your integration, but it does not make Media.net return test ads. No fill during a small test can be normal and does not by itself indicate that the setup is broken.
## Troubleshooting
### Media.net is not listed
Media.net is currently beta in CloudX. Contact your CloudX account manager to request access if it is not visible in the `Bidders` section.
### Media.net is not bidding
Check the following first:
* `Media.net` is enabled in the `Bidders` section
* The required account-level `Media.net Publisher ID` is present
* A `Media.net` line item exists for the ad unit
* The ad unit is Banner, MREC, Interstitial, or Rewarded (Native is not supported)
* Your app-ads.txt file includes `media.net, , DIRECT` with the correct Publisher ID
* The app store listing points to the developer domain hosting the updated app-ads.txt file
### Media.net bids but the ad does not render
Check the following:
* Your app is using the CloudX `app_key` and loading the intended CloudX ad unit
* Your app is on a current CloudX SDK version
* The ad unit is configured as Banner, MREC, Interstitial, or Rewarded
Media.net creatives render through the CloudX SDK's built-in renderer. If a specific creative fails consistently, contact CloudX support with the app, ad unit, and approximate time of the failure.
### Demand is lower than expected
* Confirm with Media.net that your Publisher ID and app-ads.txt line are correct for your account.
* Allow time for Media.net and its buyers to re-crawl the updated app-ads.txt file.
* Validate with controlled live volume because Media.net does not provide RTB test demand.