> ## Documentation Index
> Fetch the complete documentation index at: https://docs.cloudx.io/llms.txt
> Use this file to discover all available pages before exploring further.
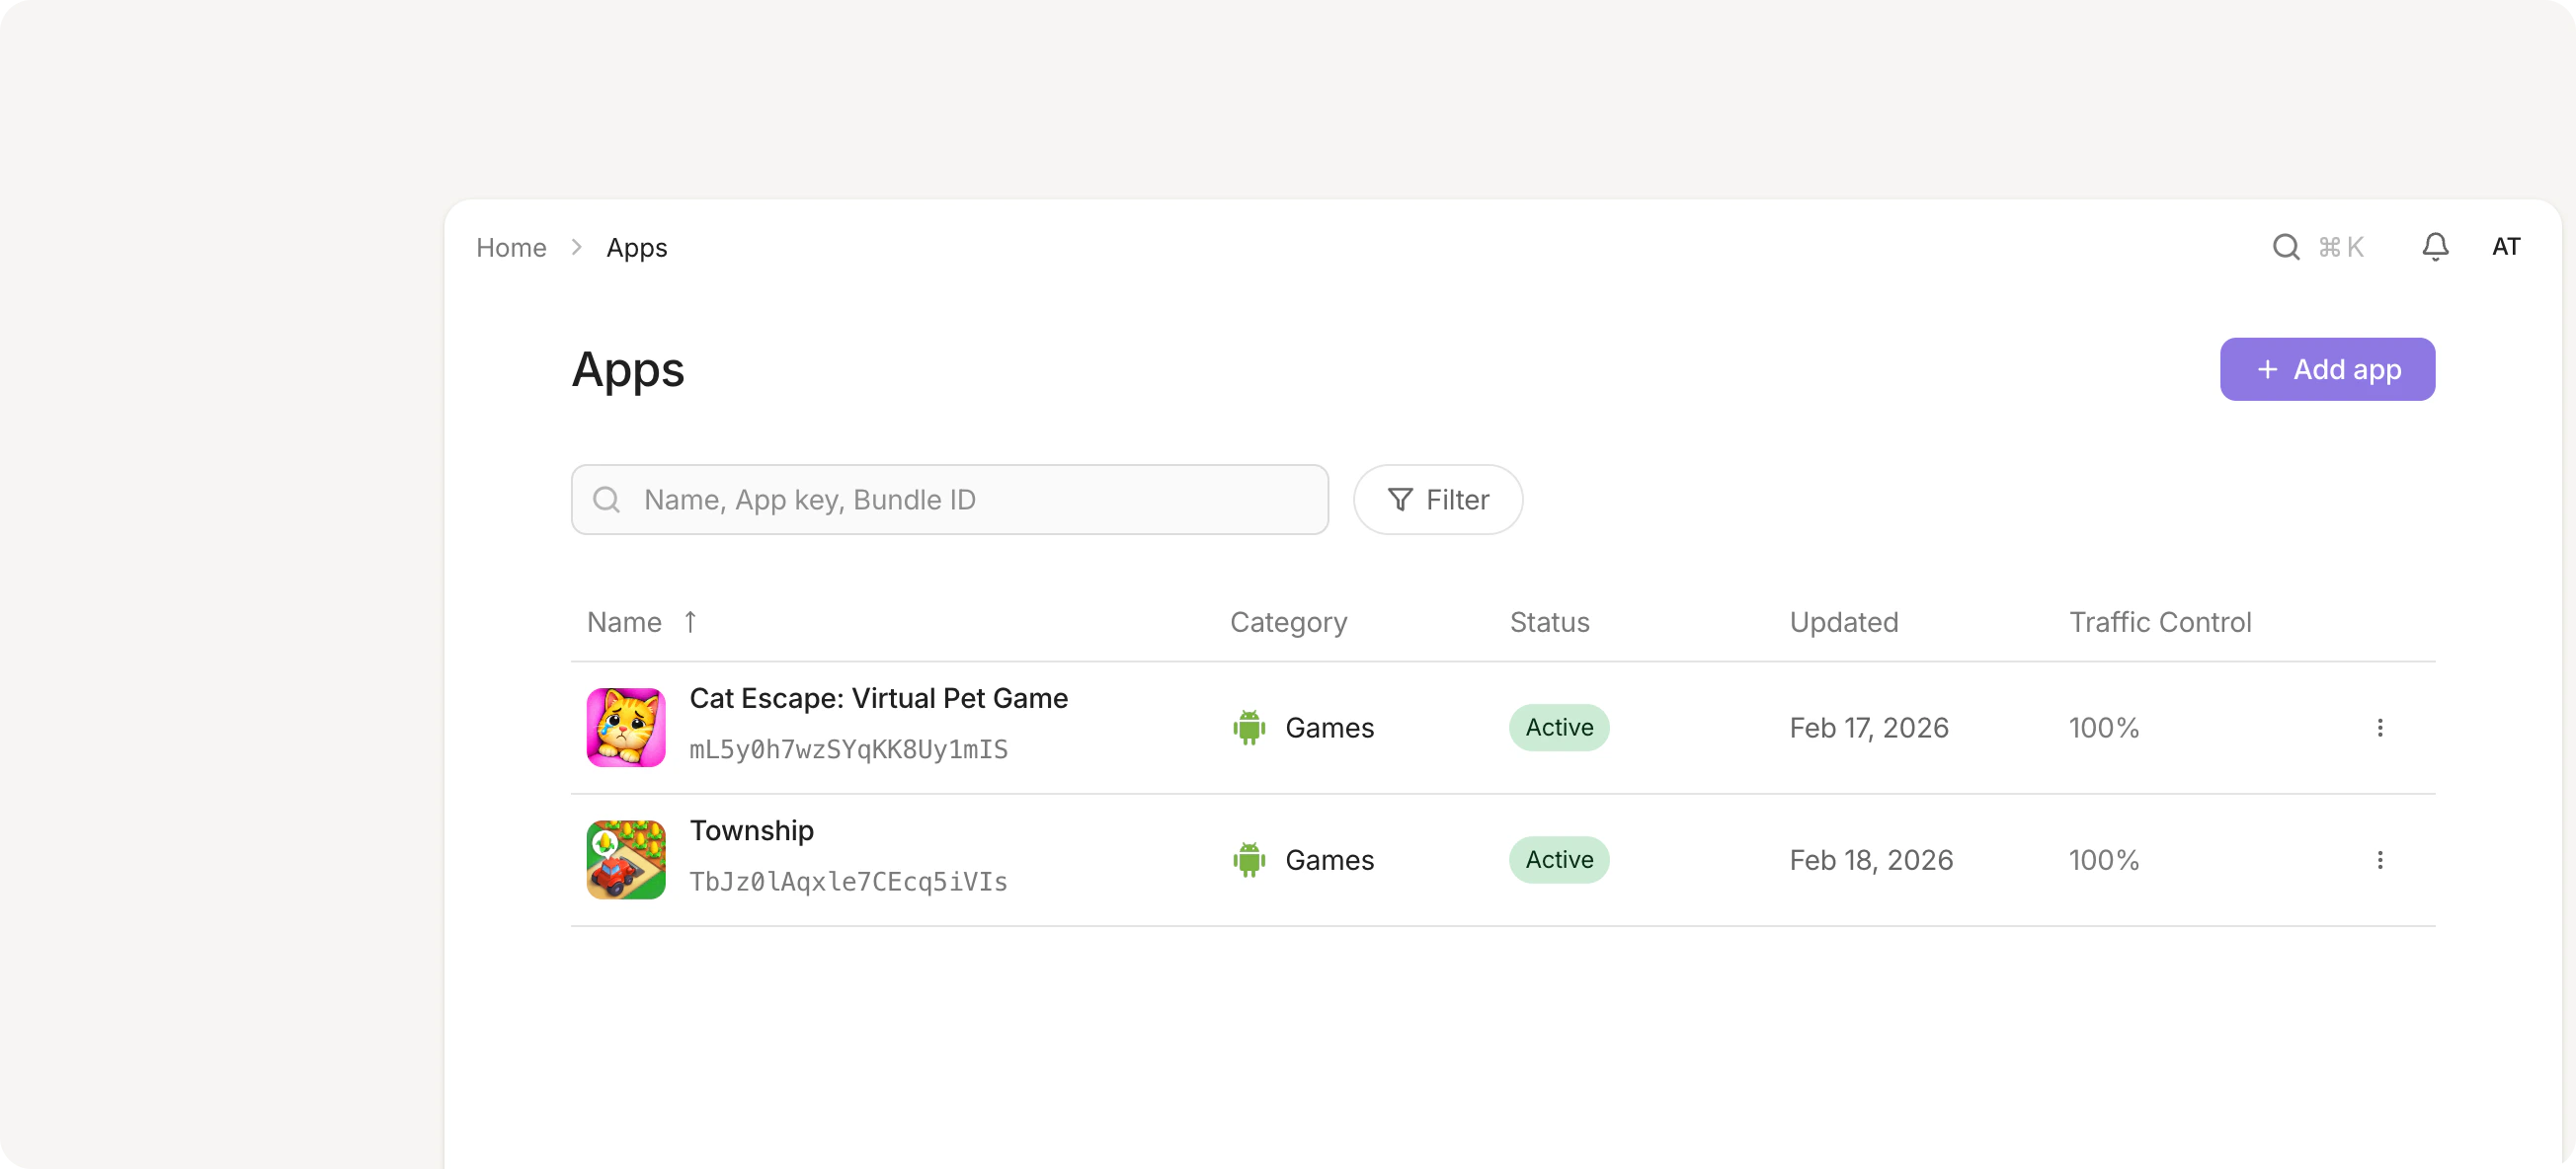
# Apps
> Apps are the foundation of your CloudX setup. Each app represents a mobile application where you'll manage ad units and monetization.
# Set up an app
CloudX can automatically pull app details from the App Store or Google Play Store. Start typing your bundle ID or app name in the search field and select it from the results.
1. Navigate to **Apps** in the sidebar
2. Click **Add app** in the top right
3. Search for your app by bundle ID, name
4. Select your app from the dropdown if it appears, or add it manually
If your app is not live yet:
1. Enter your **Application name**
2. Select your platform (iOS or Android)
3. Enter your **Bundle ID**
4. Select an **Application category**
5. Add a **Description** with notes about the app (optional)
6. Upload an **App icon** (optional)
7. Click **Save**
After creating your app, it's set to **Inactive** status by default, which means it only serves test requests.
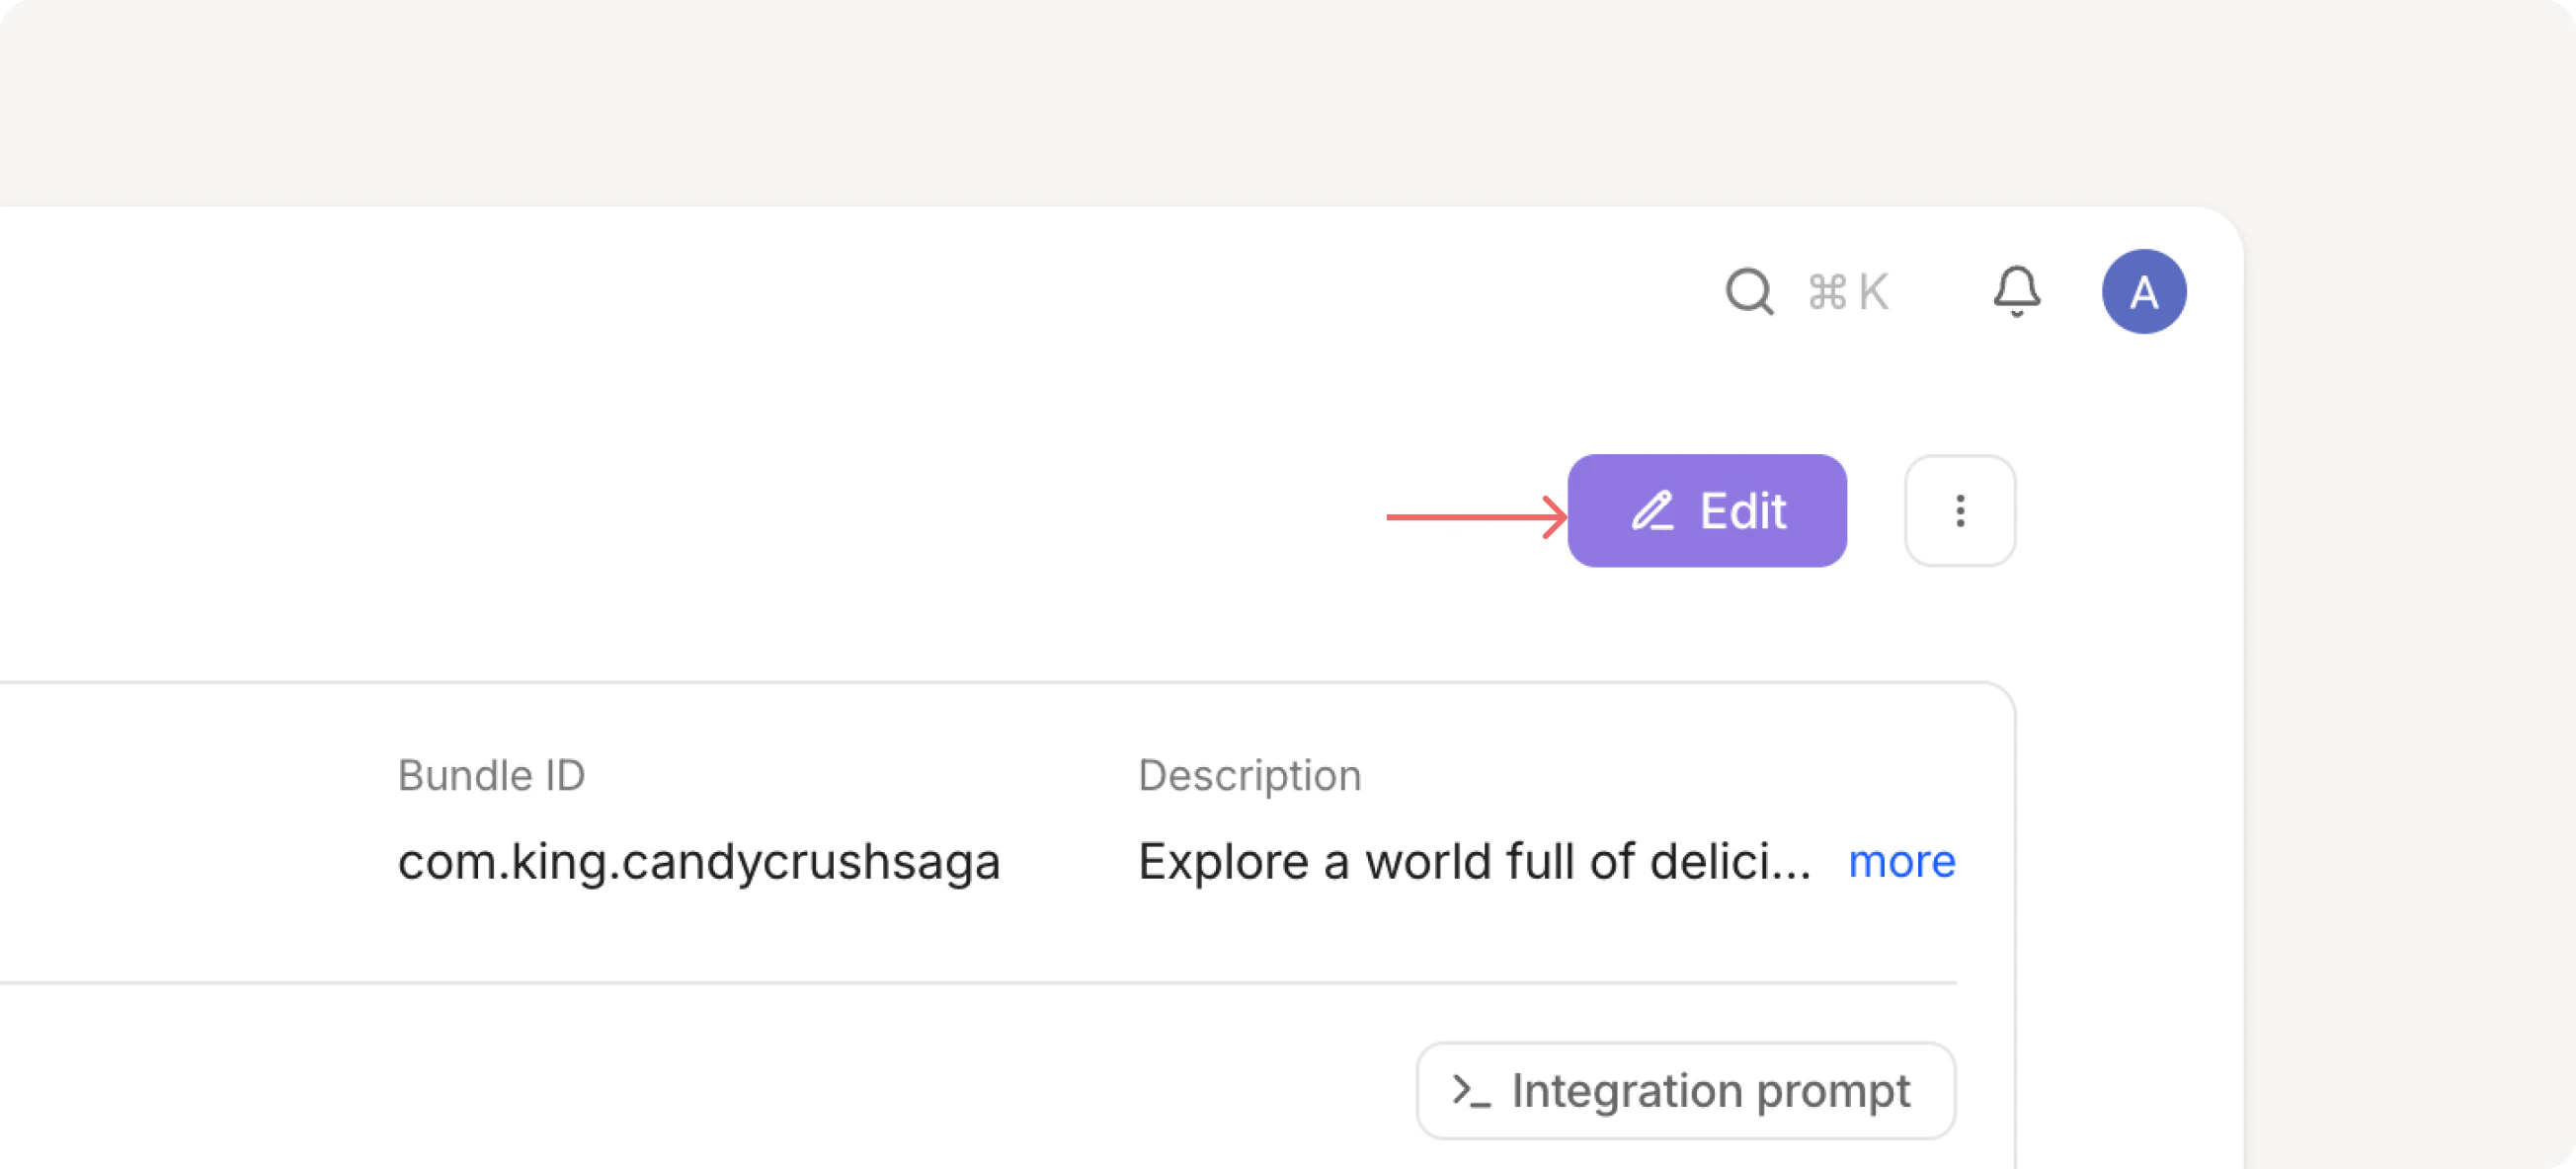
# Edit an app
Making changes to an app after creation.
1. Navigate to your app page
2. Click **Edit** in the top right
3. You can edit an app name, description, category, or icon
4. Click **Save**
## App Status
* **Active** — app is live and serving real traffic
* **Inactive** — app is in test mode and serving only test requests
Real ads will start running after your app passes moderation (when its status changes to **Active**).
## Disabled bidders
You can switch off specific bidders for this app from the app's **Edit** page: select them in the **Disabled bidders** field and click **Save**. This overrides the account-level setting in `Operations -> Bidder Configuration` — the bidder stays enabled for your other apps. Leave the field empty to run every bidder enabled for your account.
A disabled bidder is dropped from this app's SDK initialization, so the SDK never loads or requests it. Useful for temporarily pausing a network on one app — for example, while you roll out an SDK update. Changes apply on the next SDK initialization.
To configure your networks, read the [network guides](/en/networks).
 # Set up an app
CloudX can automatically pull app details from the App Store or Google Play Store. Start typing your bundle ID or app name in the search field and select it from the results.
1. Navigate to **Apps** in the sidebar
2. Click **Add app** in the top right
3. Search for your app by bundle ID, name
4. Select your app from the dropdown if it appears, or add it manually
If your app is not live yet:
1. Enter your **Application name**
2. Select your platform (iOS or Android)
3. Enter your **Bundle ID**
4. Select an **Application category**
5. Add a **Description** with notes about the app (optional)
6. Upload an **App icon** (optional)
7. Click **Save**
# Set up an app
CloudX can automatically pull app details from the App Store or Google Play Store. Start typing your bundle ID or app name in the search field and select it from the results.
1. Navigate to **Apps** in the sidebar
2. Click **Add app** in the top right
3. Search for your app by bundle ID, name
4. Select your app from the dropdown if it appears, or add it manually
If your app is not live yet:
1. Enter your **Application name**
2. Select your platform (iOS or Android)
3. Enter your **Bundle ID**
4. Select an **Application category**
5. Add a **Description** with notes about the app (optional)
6. Upload an **App icon** (optional)
7. Click **Save**
 1. Navigate to your app page
2. Click **Edit** in the top right
3. You can edit an app name, description, category, or icon
4. Click **Save**
## App Status
* **Active** — app is live and serving real traffic
* **Inactive** — app is in test mode and serving only test requests
1. Navigate to your app page
2. Click **Edit** in the top right
3. You can edit an app name, description, category, or icon
4. Click **Save**
## App Status
* **Active** — app is live and serving real traffic
* **Inactive** — app is in test mode and serving only test requests